Process: CNC Carved Pedestal Bases

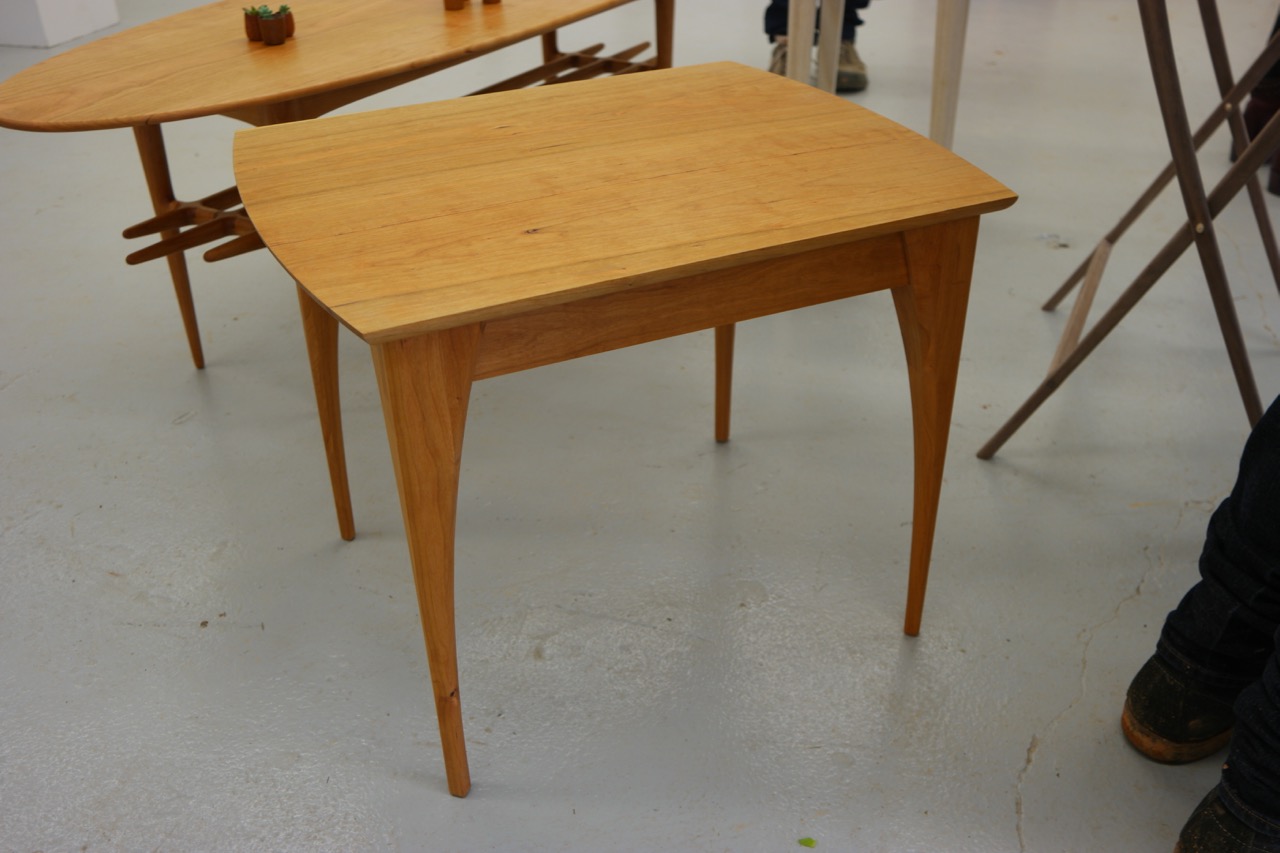
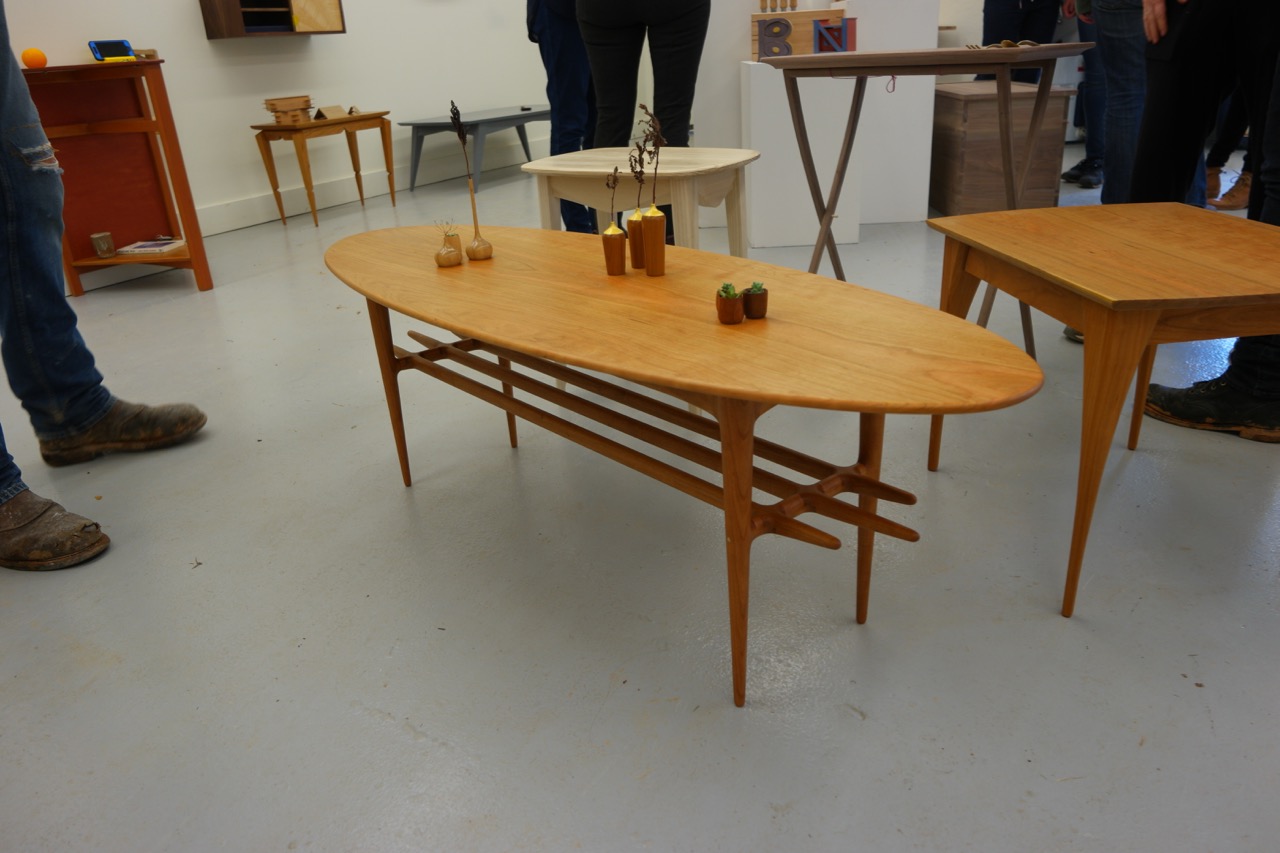
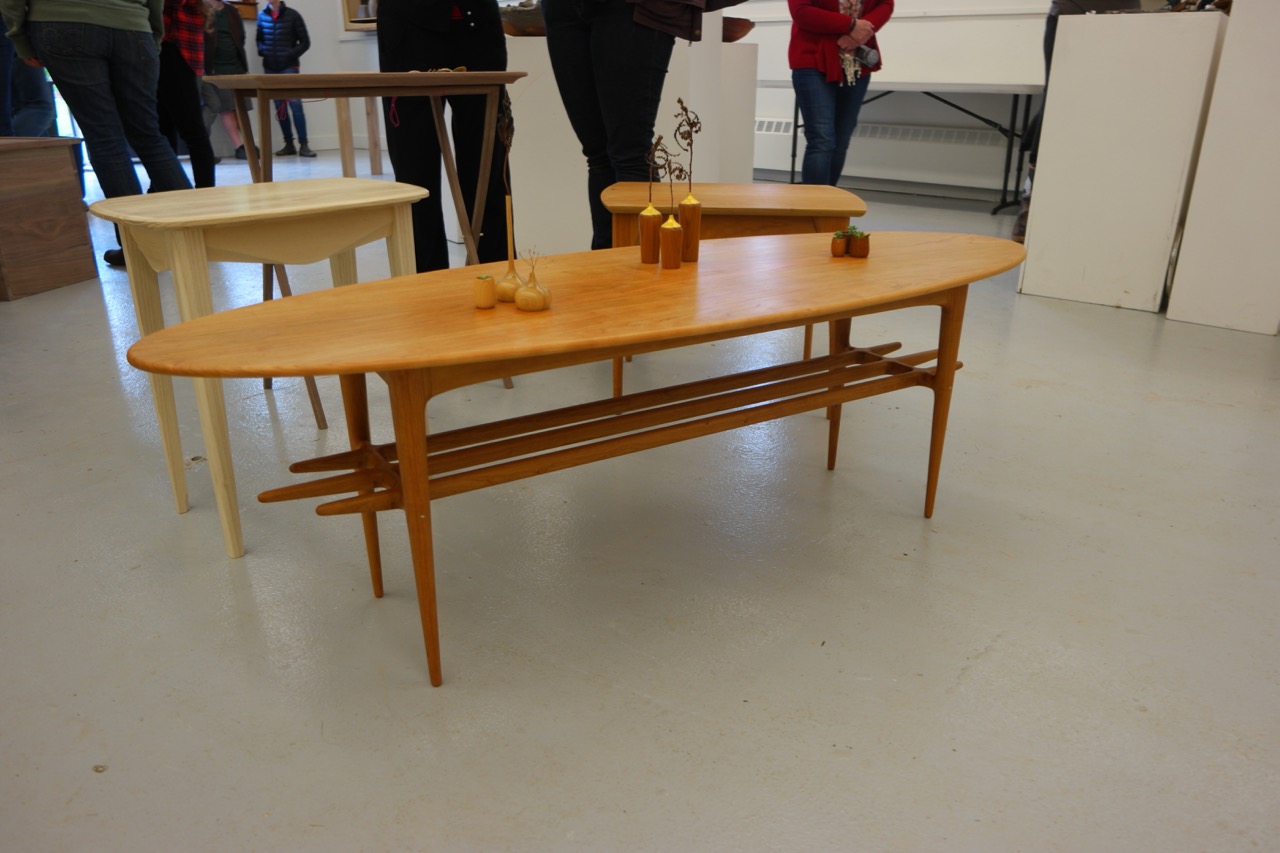
My last two table commissions have featured pedestal-style bases—a single column that supports the tabletop from the center rather than 4 legs near the edges. This type of base is great for tables that expand in length, for tables with tilting tops, and for having lots of room for human legs since the support is all in the center. In the case of my recent projects, the pedestal base also offered a fun design opportunity. With all the structure clustered together, I wanted to create bases where the legs and central column flowed together into one seamless, branching form. I imagined bases that reference tree roots, fingers, veins, tributaries, etc. One form splits into several, distributing its strength to a larger area. These are the forms I came up with, and if you keep reading, I’ll describe some of the process. As is always the case with furniture, forms that have no flat or straight references are pretty tricky to manufacture!

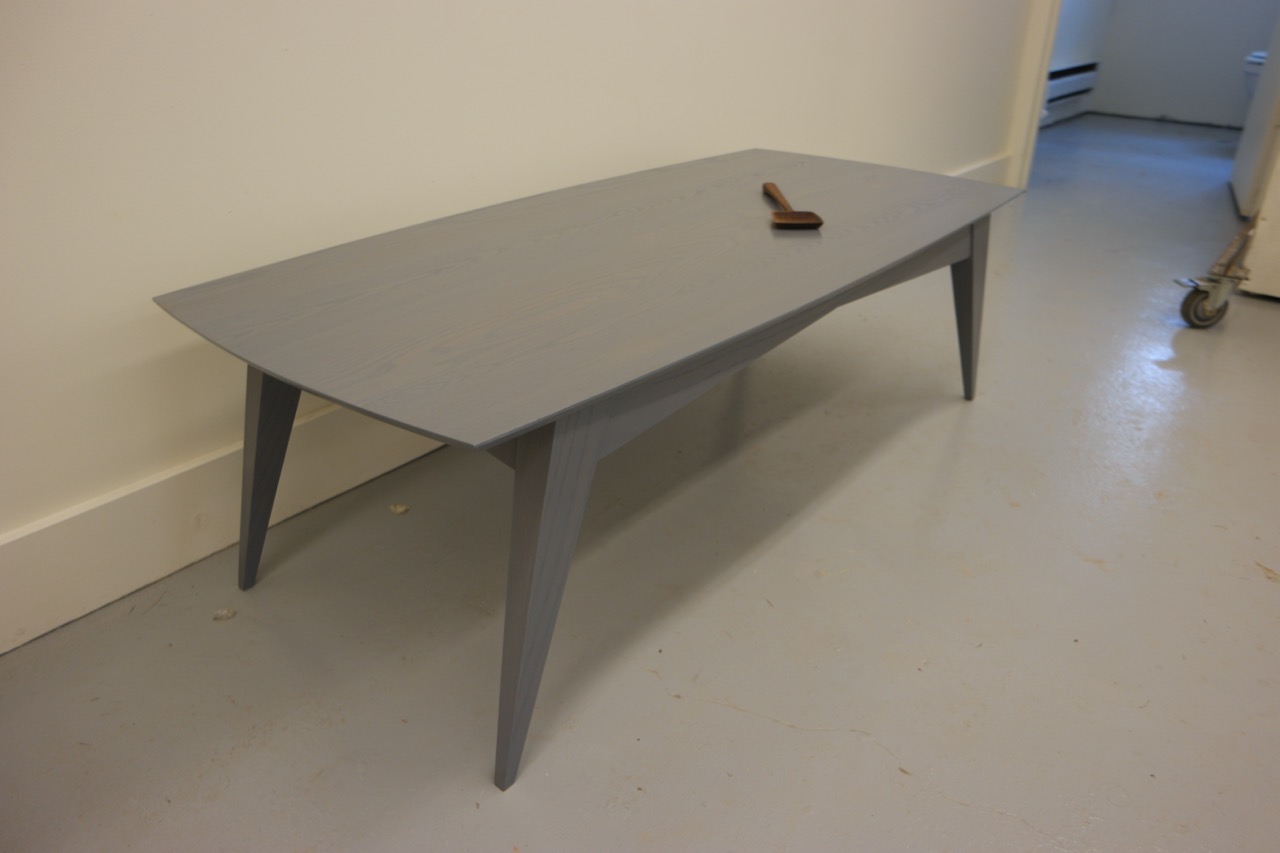
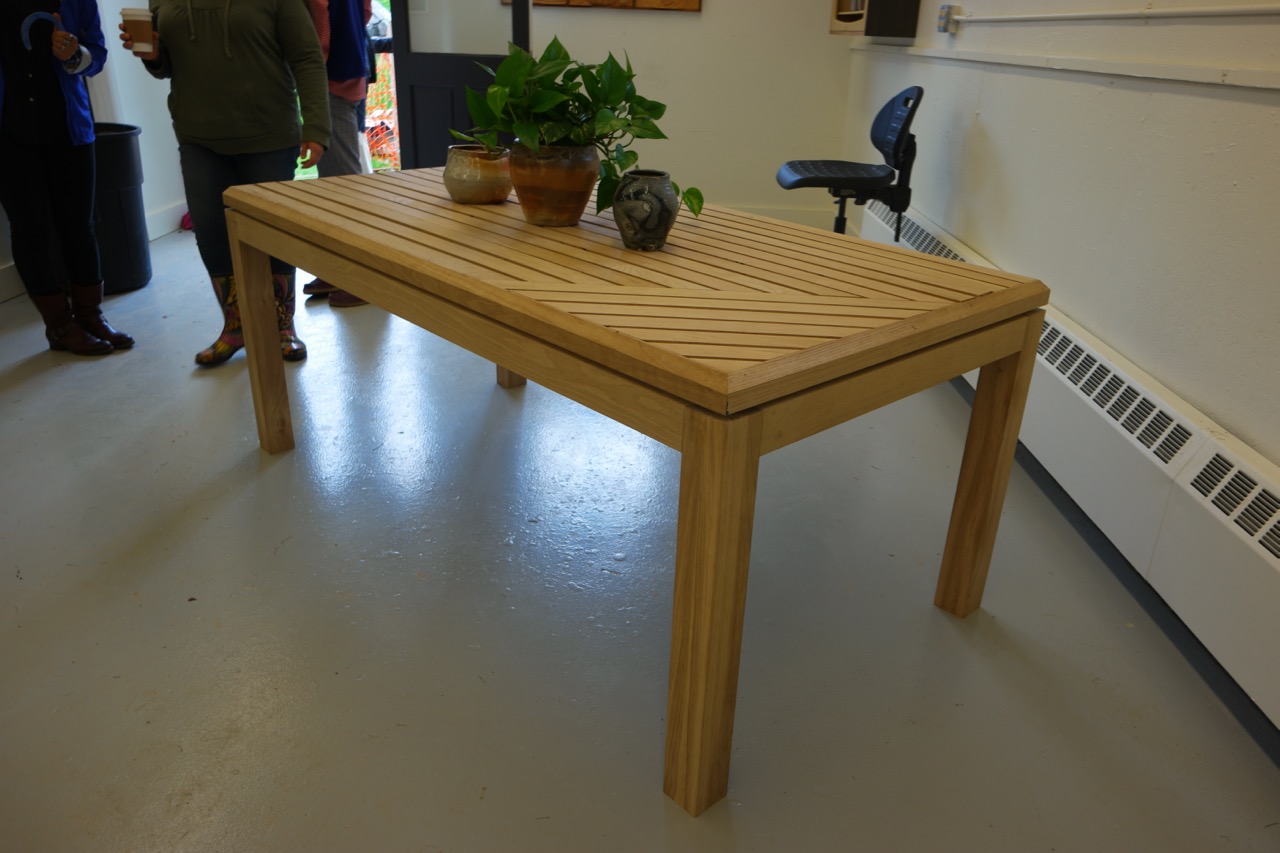
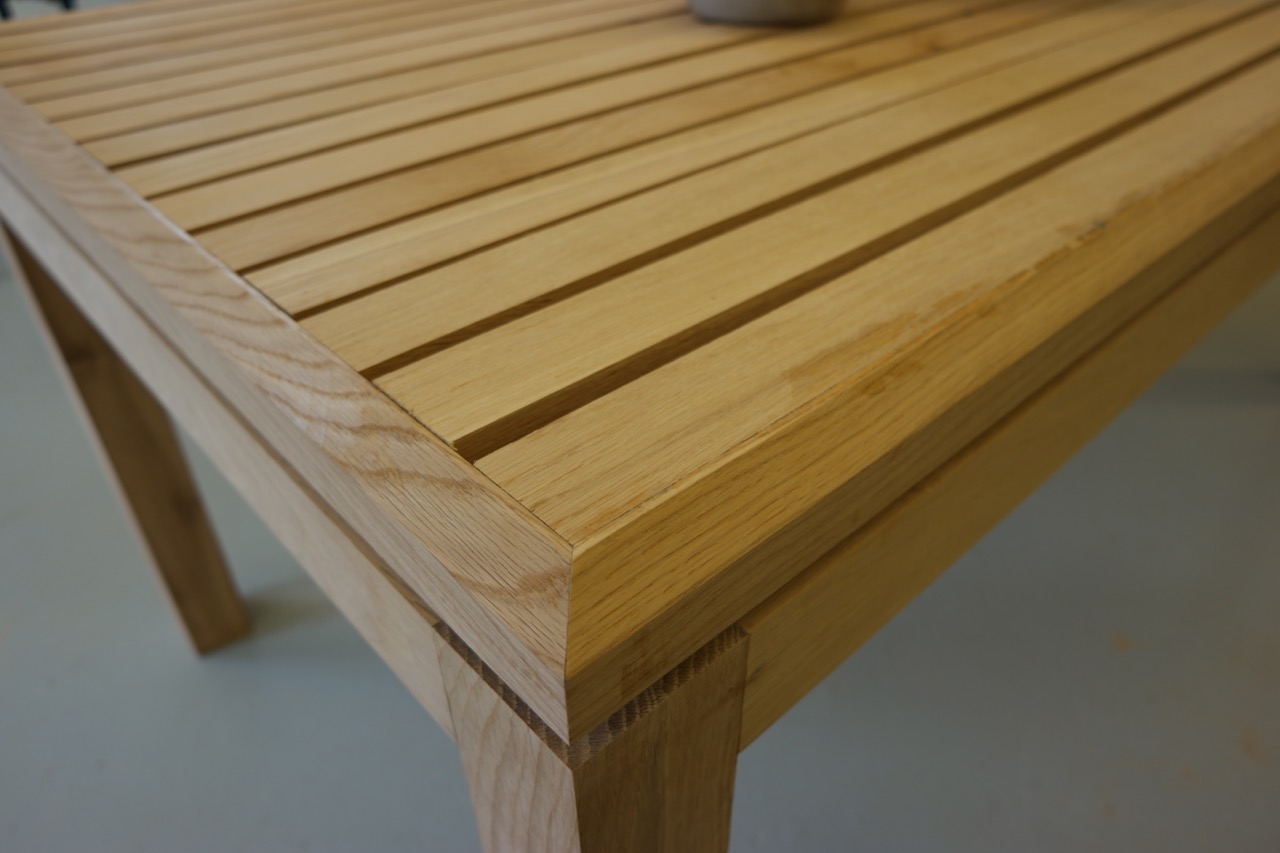
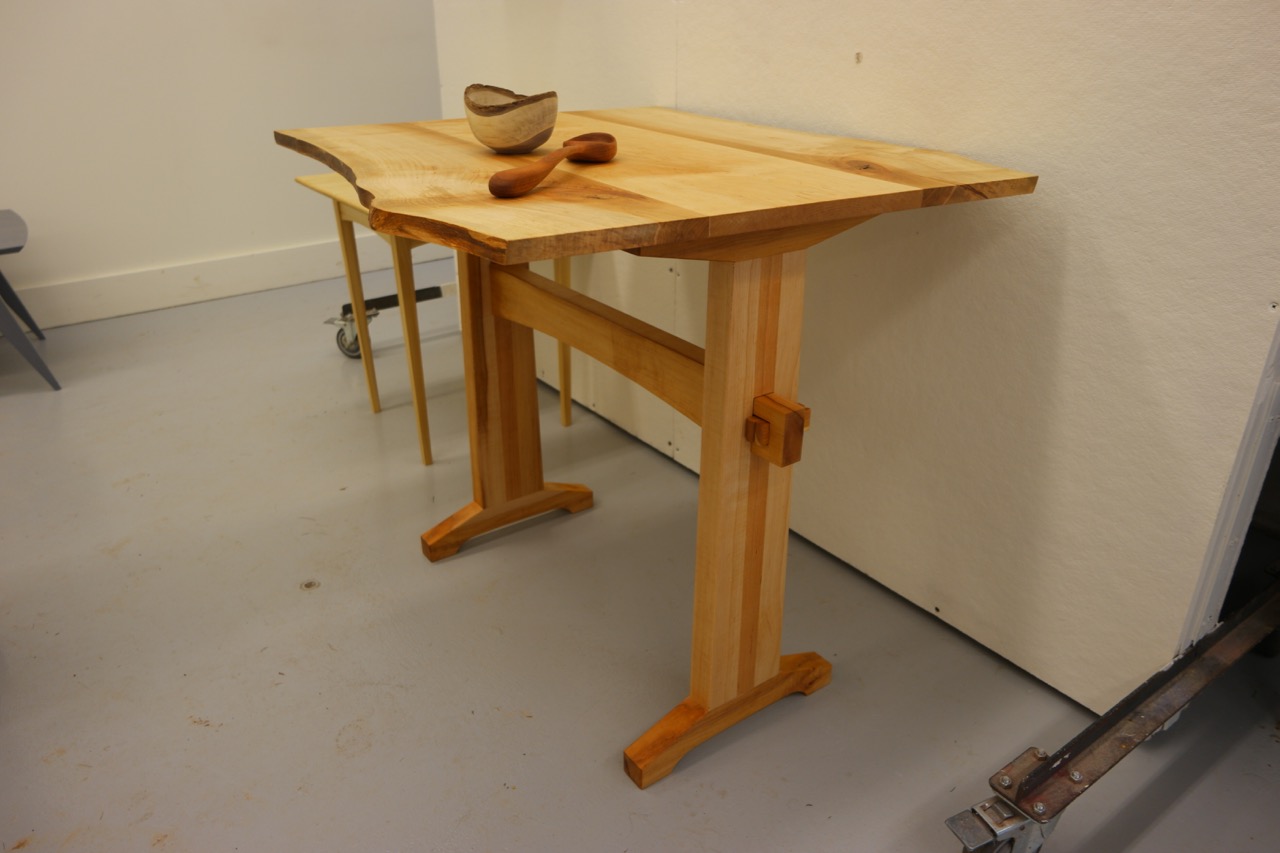
Split-pedestal allows the top to separate and expand

A digital process

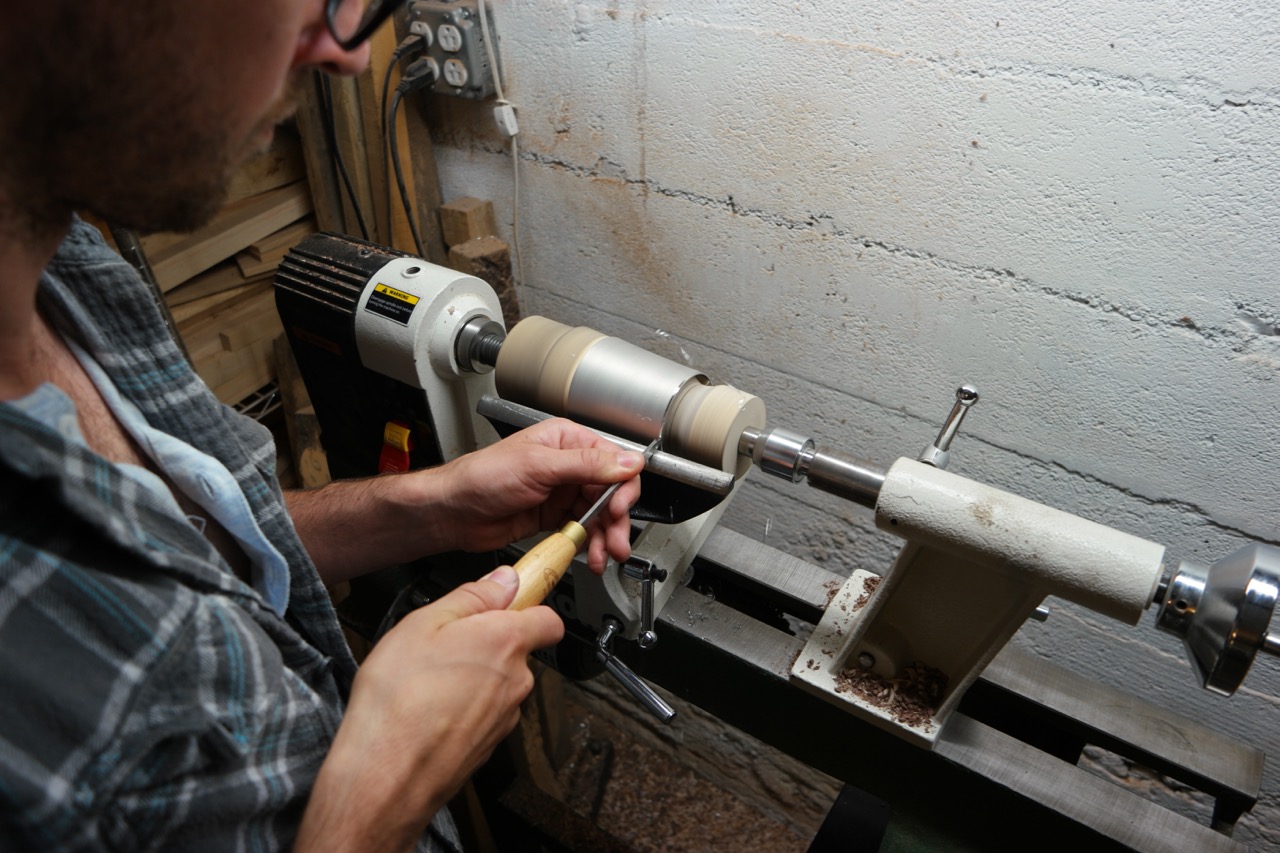
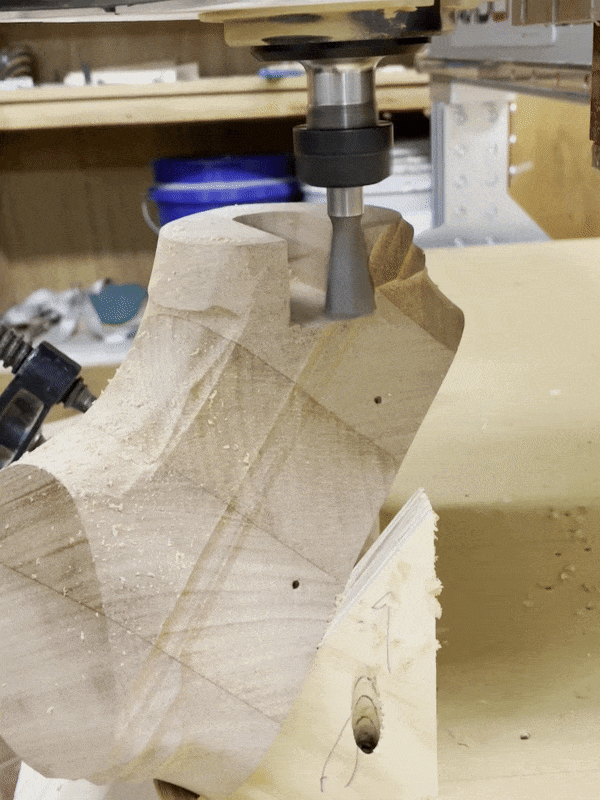
I’ve always loved making carved furniture. In the past I’ve done this by hand, but with these pieces I did most of the carving with my CNC router. There were several good reasons to use the CNC. The first is that it saved time compared to removing all the material by hand, especially on the legs where the form is repeated several times (design once, cut as many times as you want; that is the way of digital manufacturing). The second is that it freed me to remove many more reference surfaces before assembly since my pieces did not have to interface with the flat beds and fences of traditional equipment. Thirdly, this project really pushed my CNC skills (especially the joinery) and I am always trying to make sure there’s something new to learn in every project I take on.

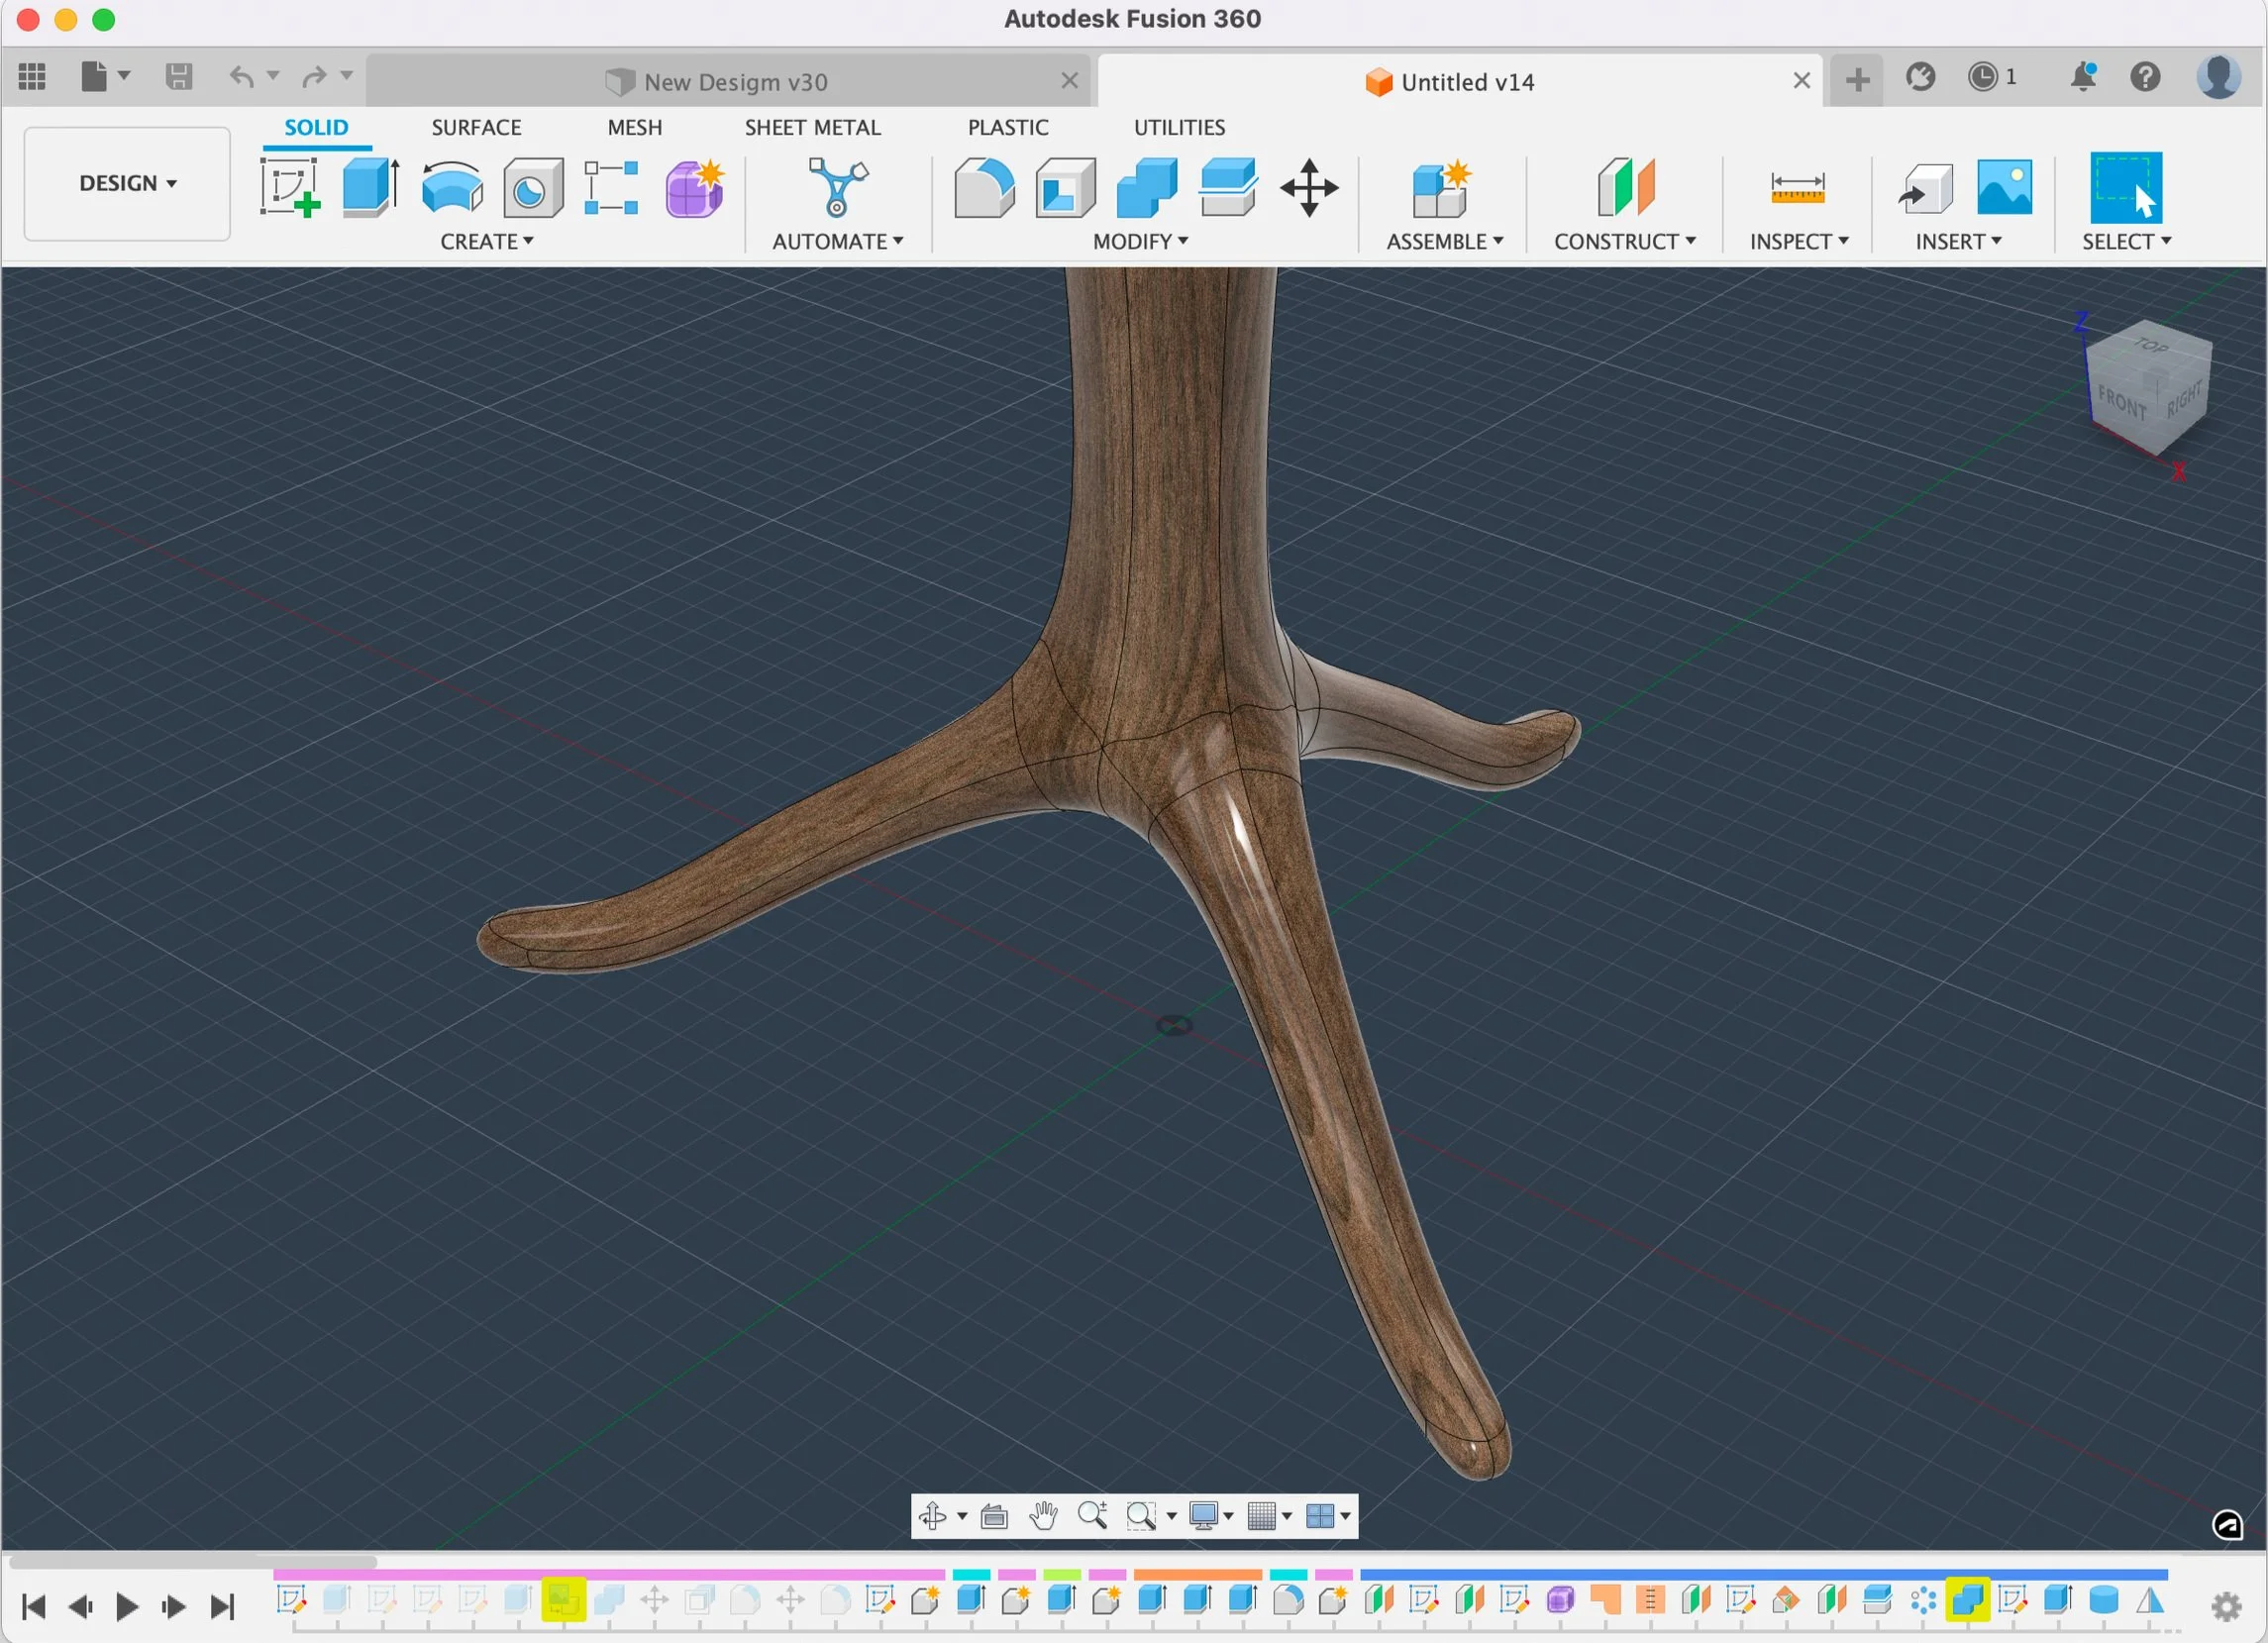
After sketching out my ideas on paper, the bases were designed using the “form” tool in Autodesk’s Fusion360 software. This type of modeling is excellent for creating smooth, fluid curvature which is exactly what I was after.

Carving

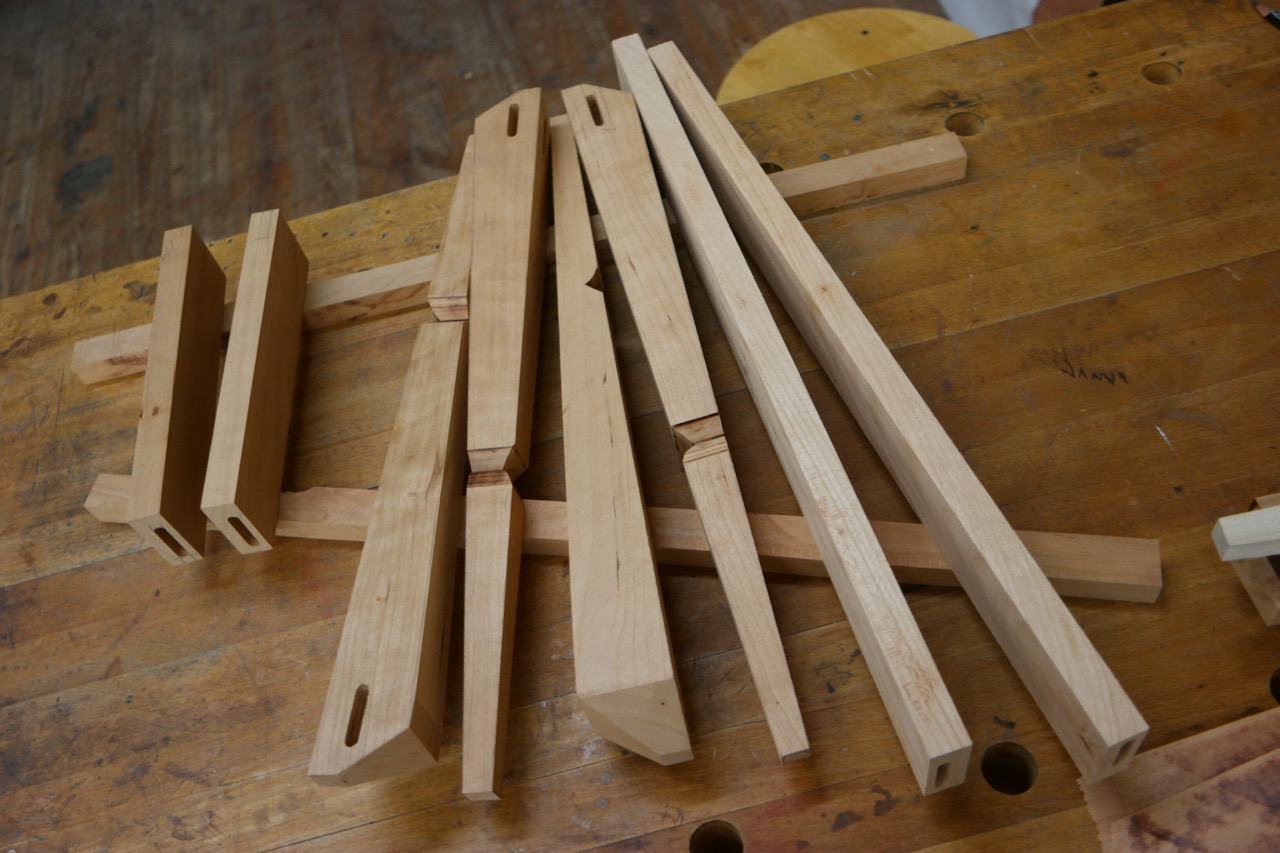
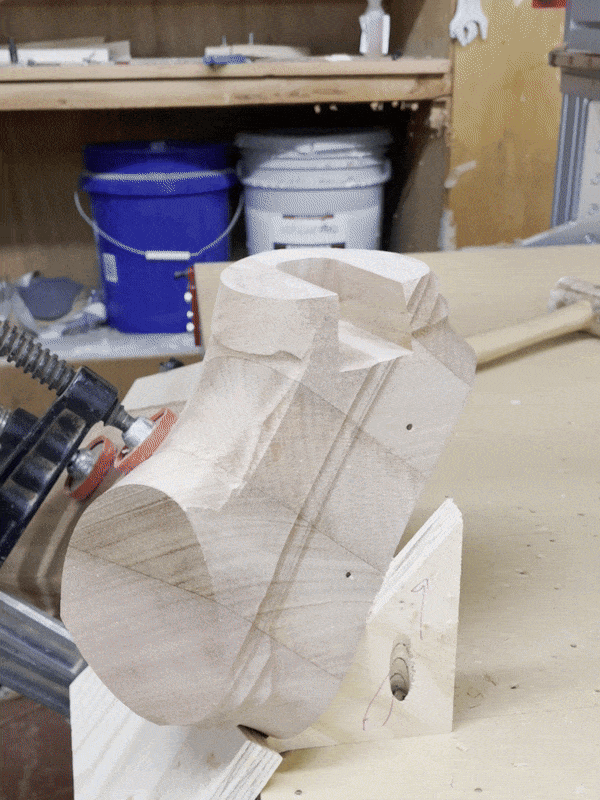
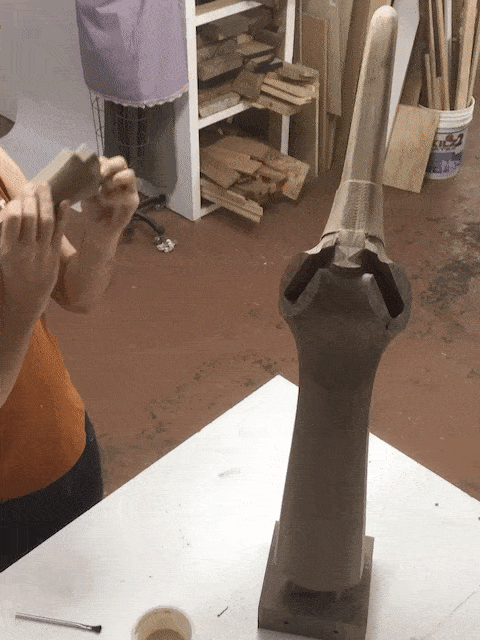
The bases are carved in separate parts: the central column and the “legs” or “branches”. The central column requires a large piece of stock. Luckily I have an extra high Z axis on my CNC router so I could get the spindle up above the stock and still have room for a 4” end mill. The stock is too thick to cut even halfway through from one side, so I had to rotate the it 4 times to carve from all sides. This is a tricky indexing operation that I am able achieve with registration pins. I have to be careful that my toolpath file corresponds with the stock orientation every time or the project will come to a sudden halt. I hope to someday get a rotary axis for this type of work, but for now this system is working well enough.

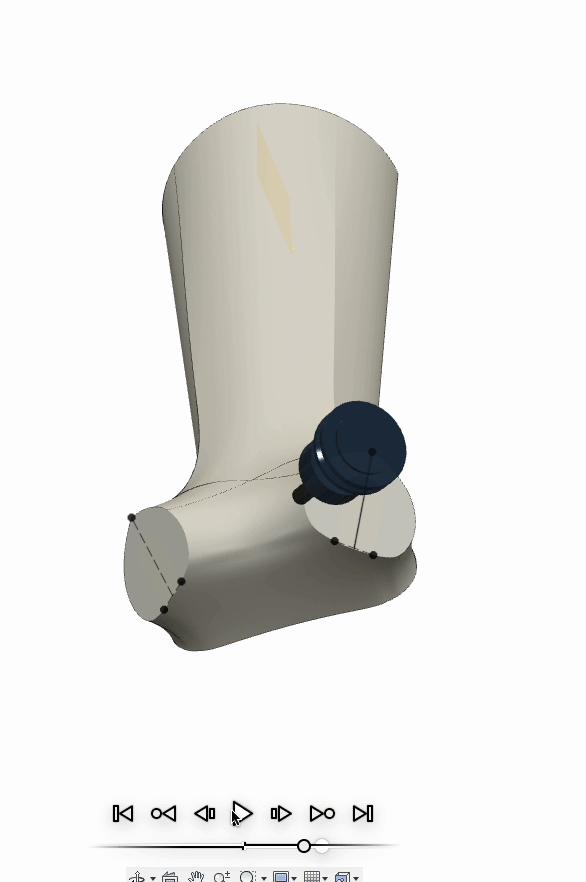
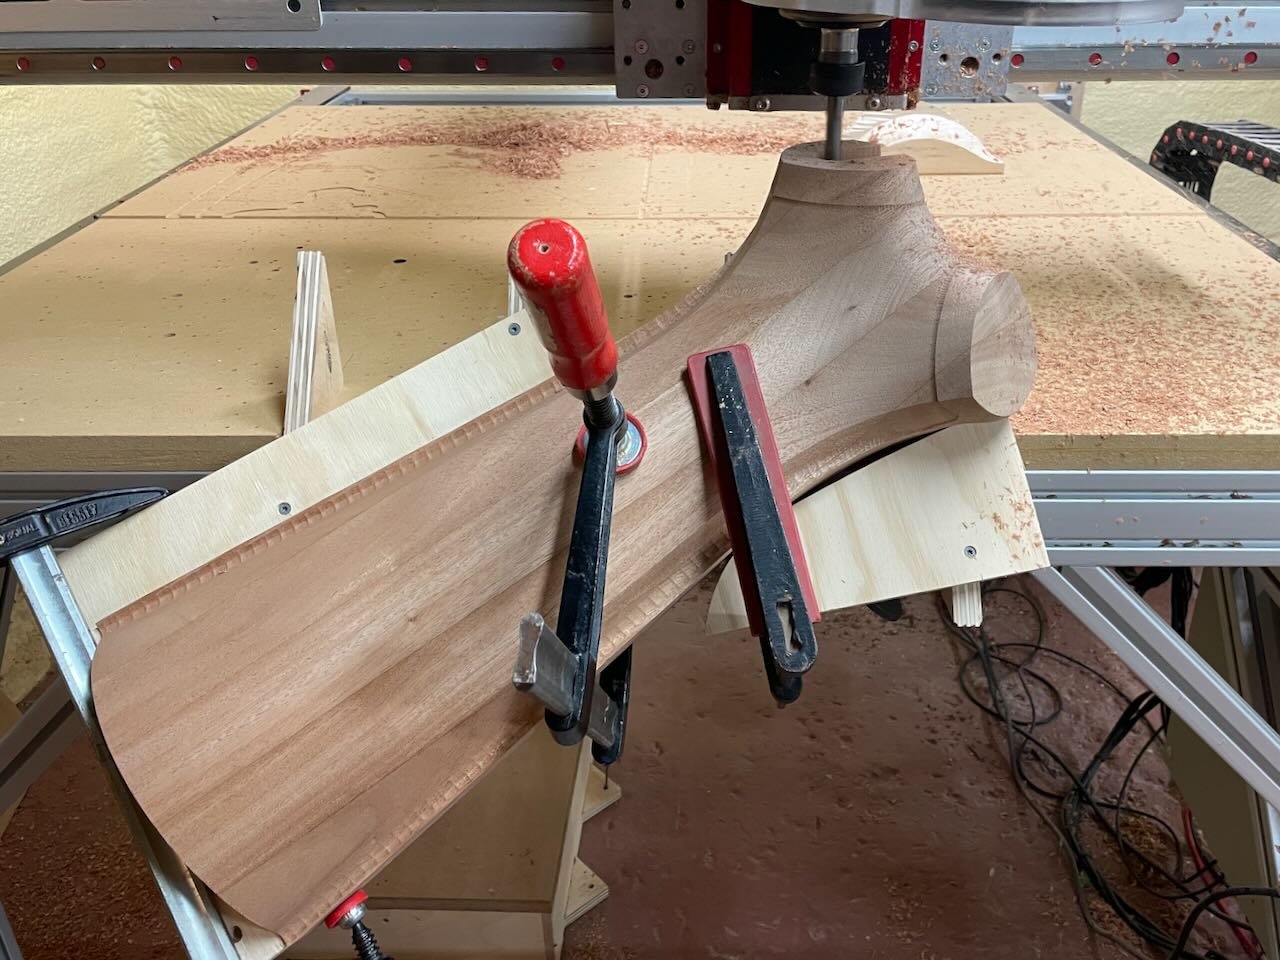
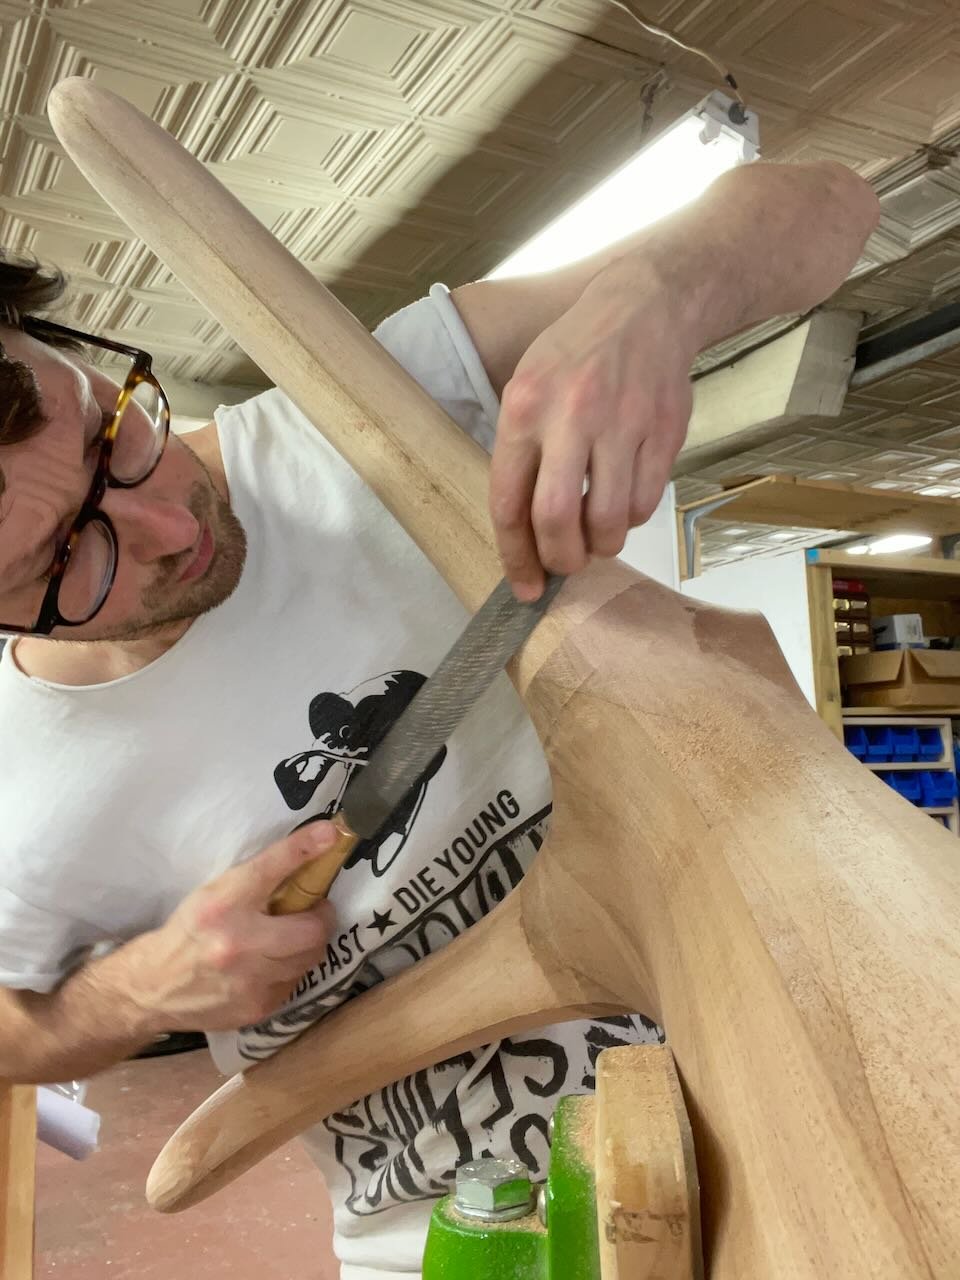
After carving the columns, I moved on to the legs. They are smaller and can be carved from only two sides. At this time, I am also roughing out the large dovetail that will connect the legs to the column. The dovetail will be manually finished and tuned to final size later when I fit the joinery.
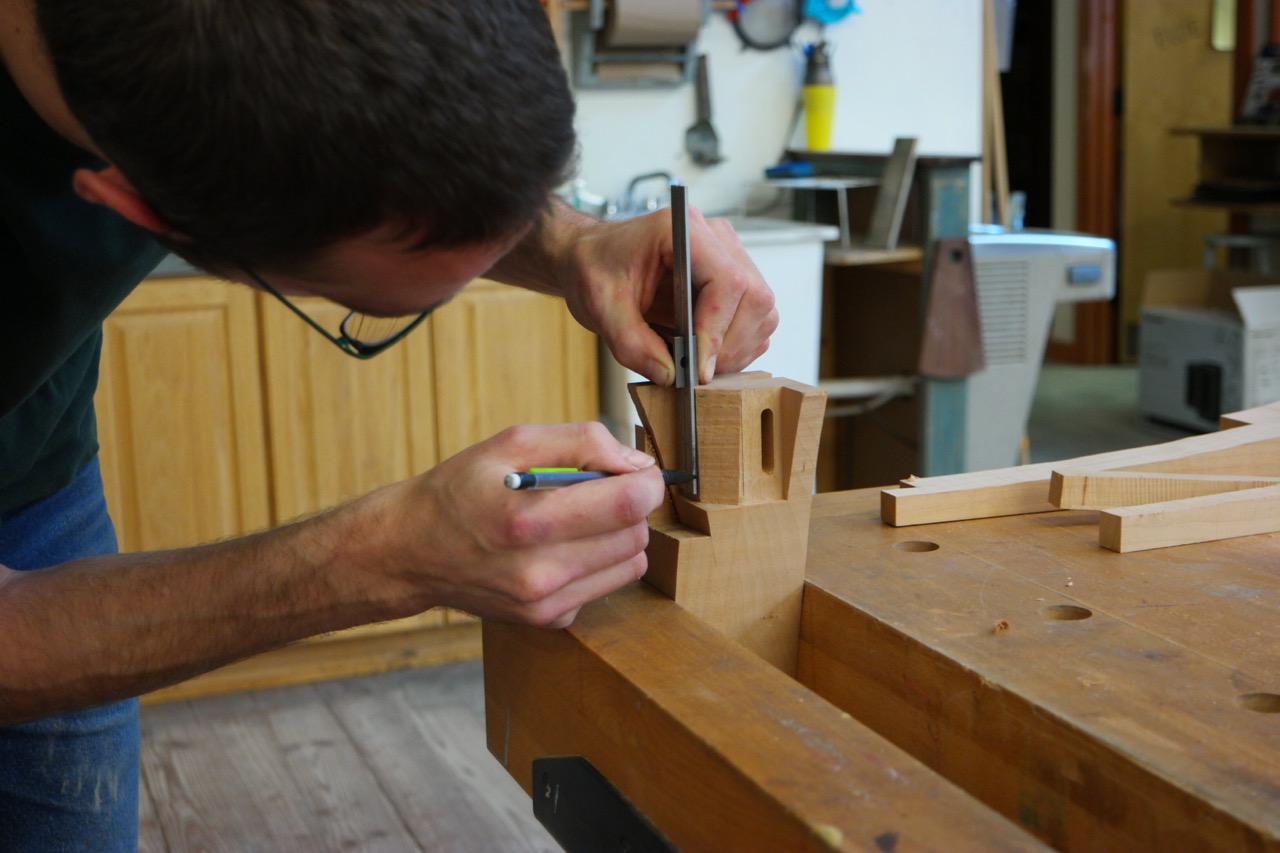
Joinery

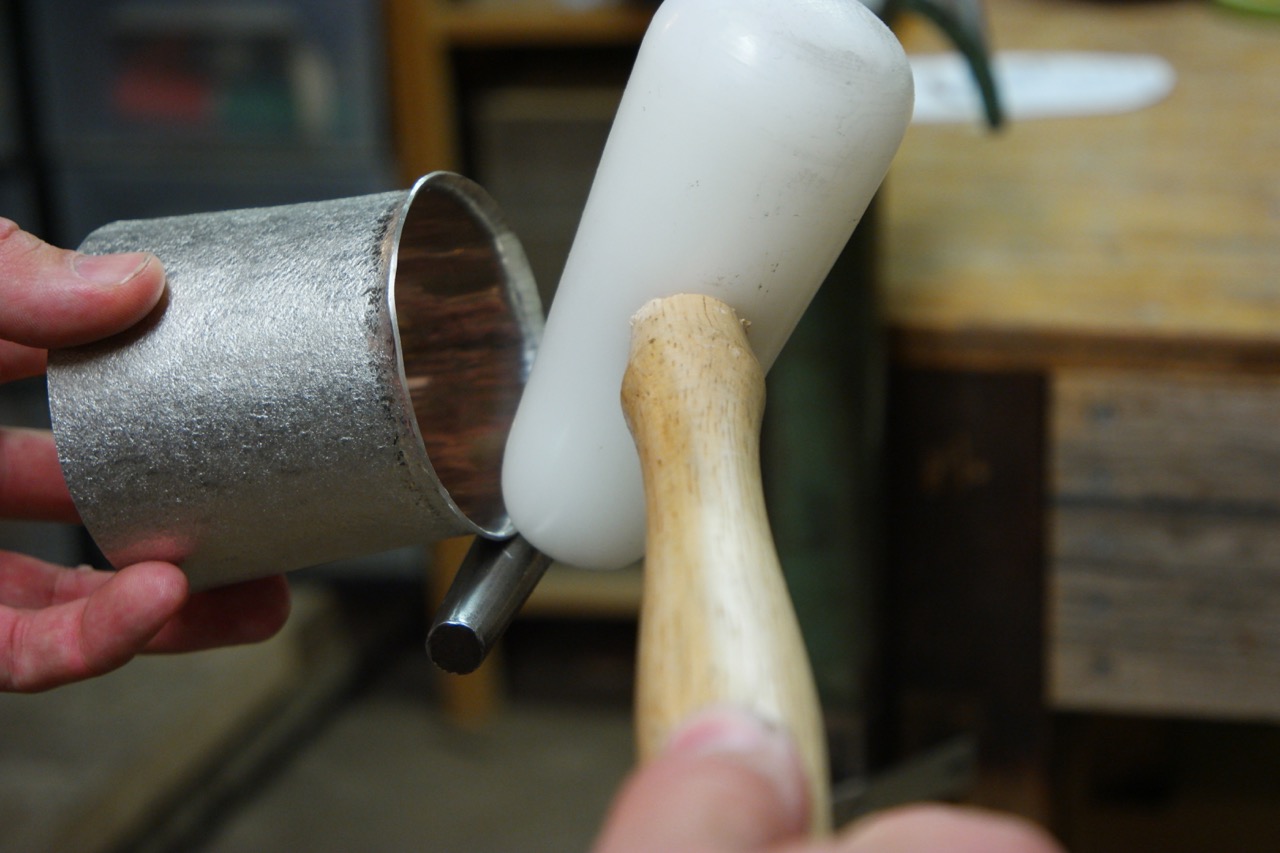
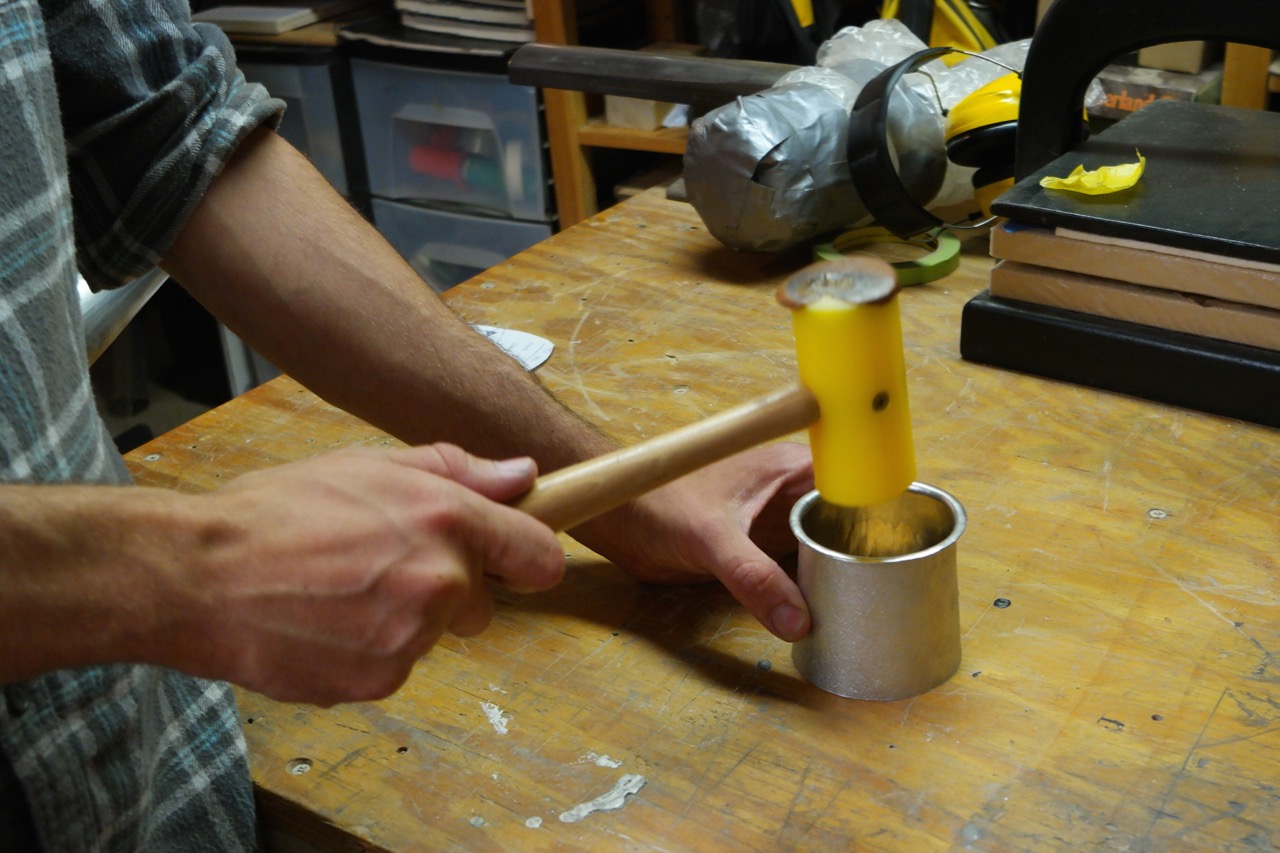
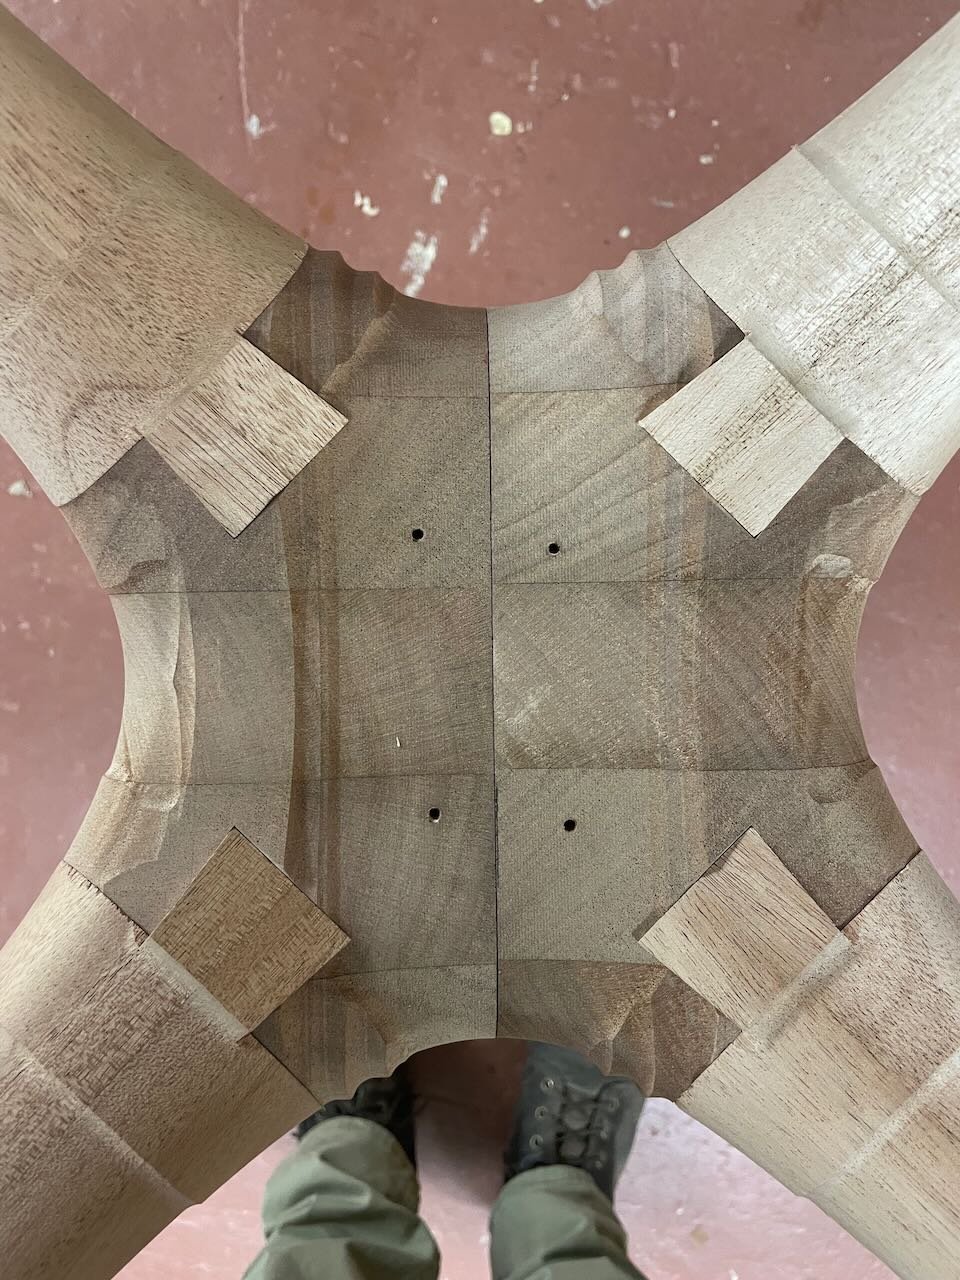
After roughing out all the pieces (which in this case means carving to final shape other than a .0625” sheath of extra material around the joints to smooth out after glue-up), I am ready to cut the sliding dovetail joinery. A sliding dovetail is the only reasonable joint to use here because it is self-clamping and at this point I have removed every flat surface. There is literally nowhere to put a clamp! It is also an extremely strong joint that I know will help ensure these tables last for generations.

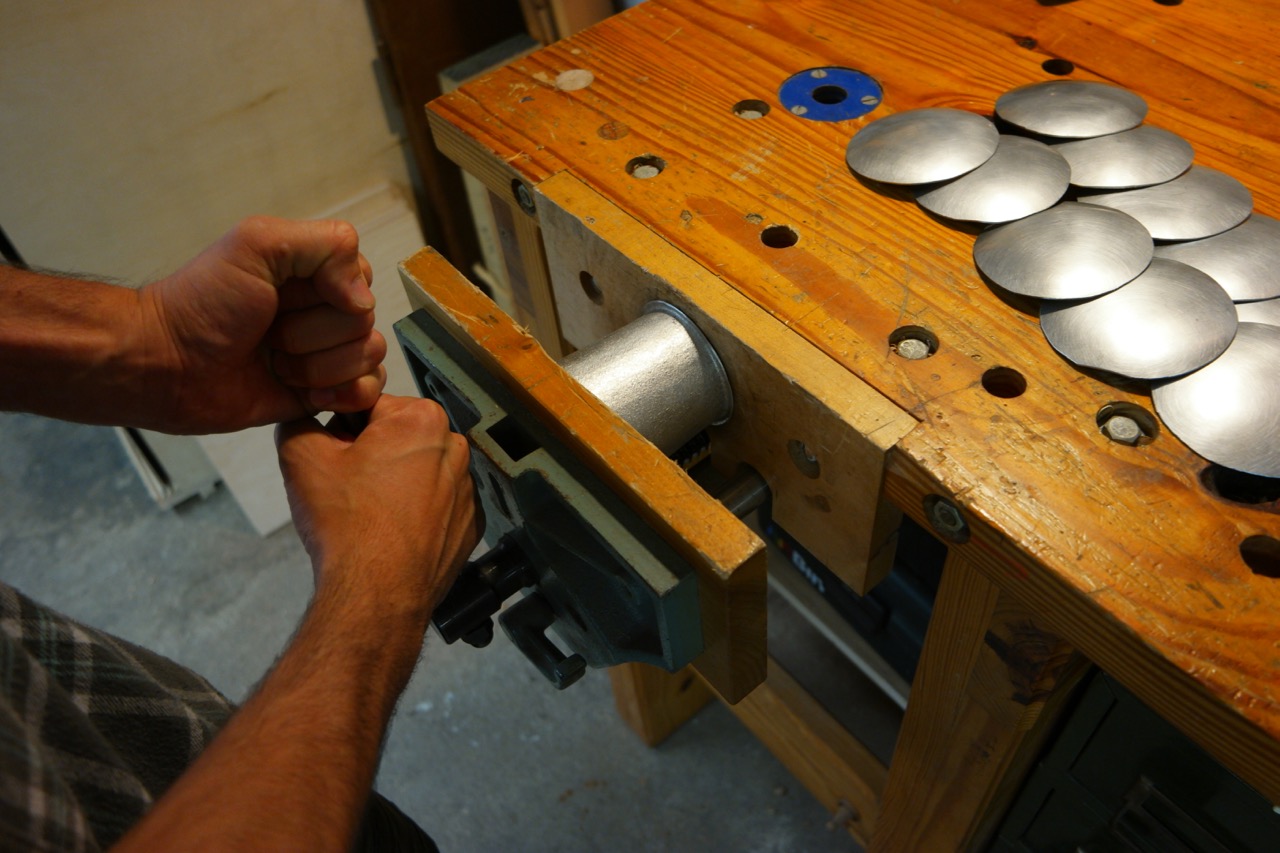
Setting up to cut the mortises involved some unconventional hold-down methods, but by using the CNC to make specially designed cradles, I was able to support the pieces at just the right angle to cut accurate joinery.

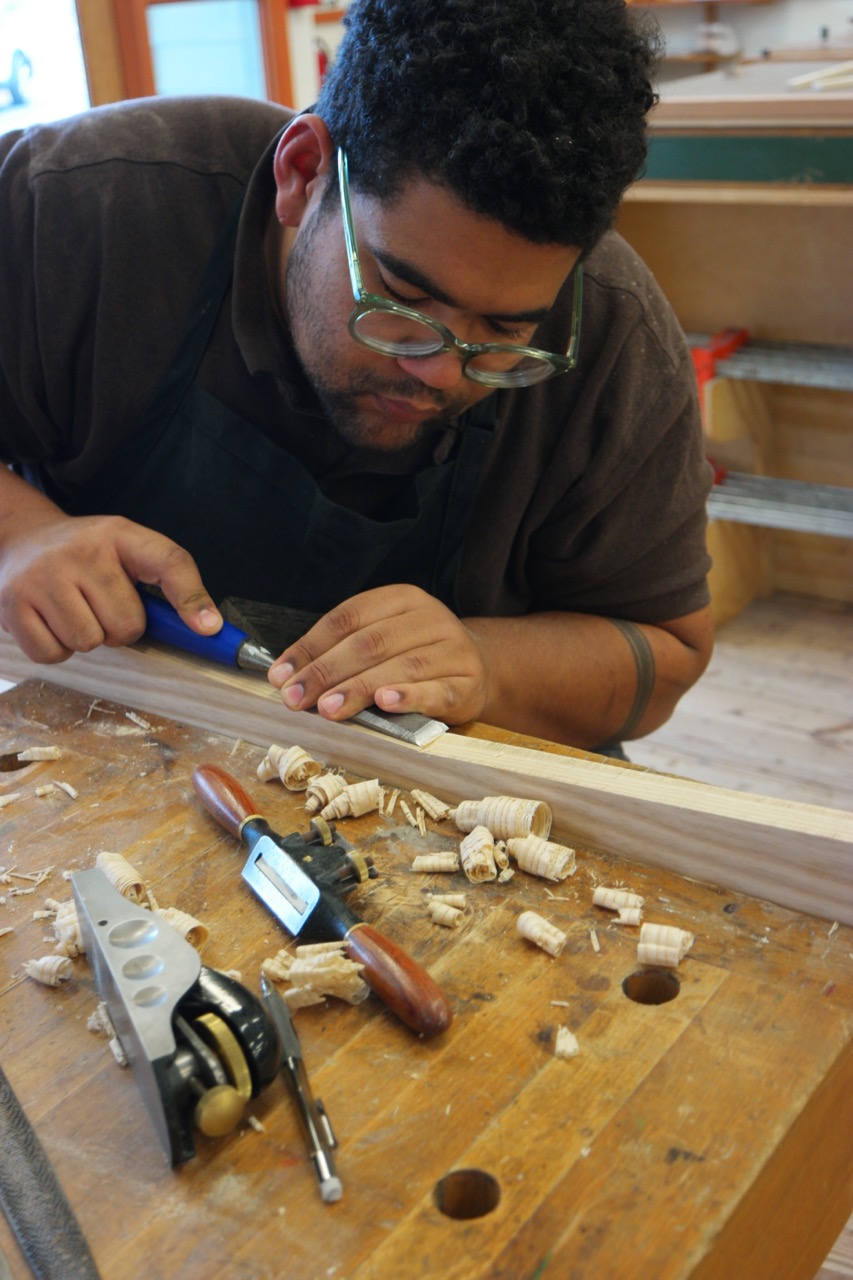
Assembly and final shaping

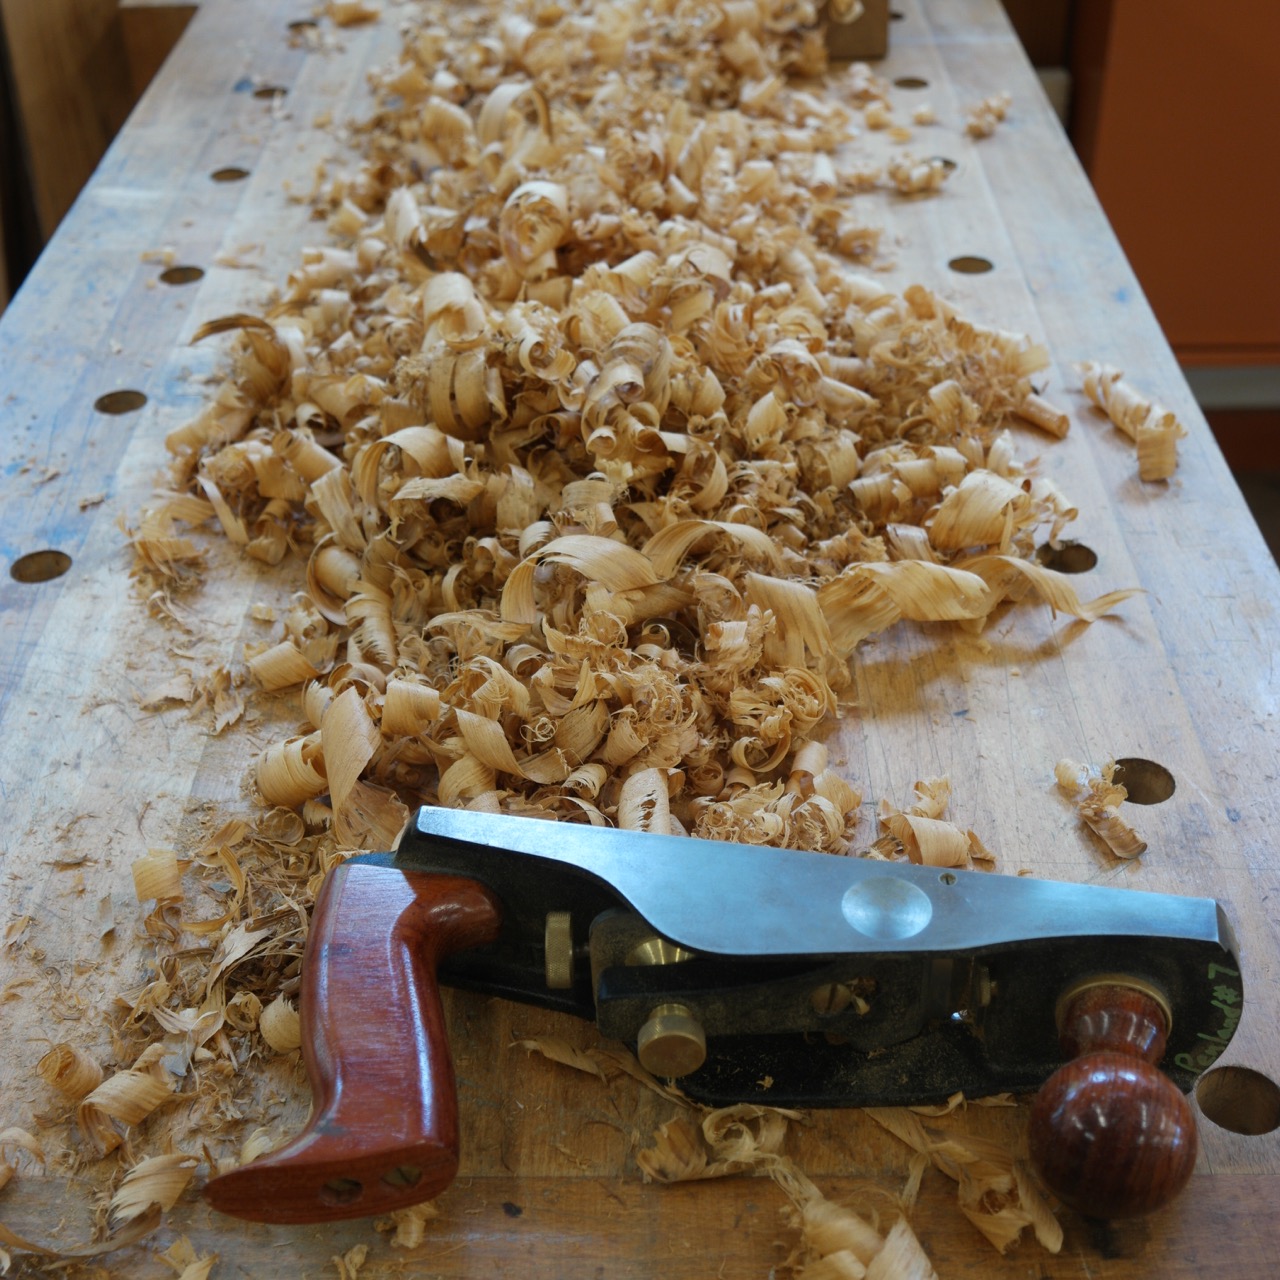
The last step is glue-it all together (honestly, this was a breeze thanks to the precise joinery and self-clamping nature of dovetails). I then used hand-tools to remove the small amount of extra material I had left around the joints and sand everything smooth.

Final thoughts

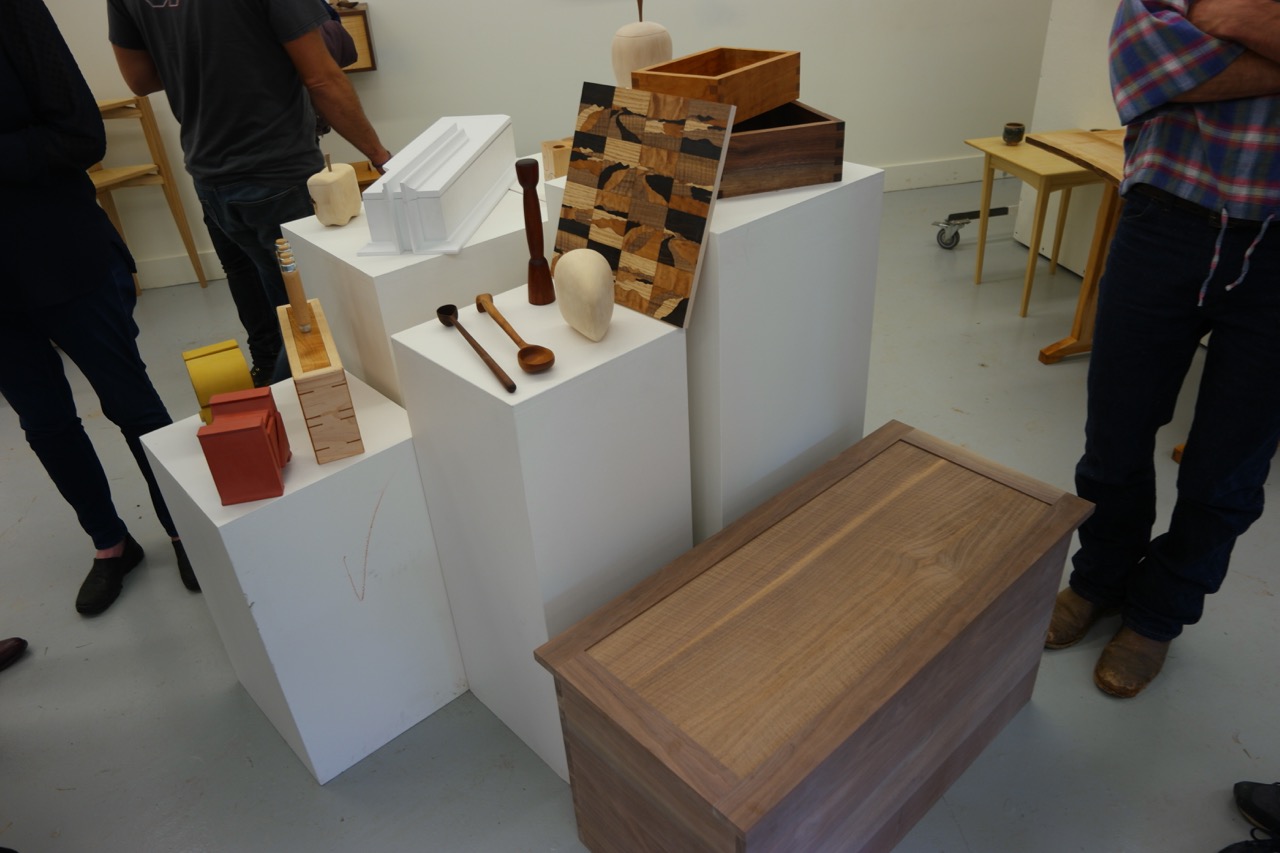
I was pleased with how these bases turned out in both design and process. This project exemplified much of what I find compelling about digital tools. I was able to create more complex and organic shapes by leaving behind the orthogonal world of flat, straight, and square references. Sometimes using digital processes can feel like you’re getting the best of two worlds: the design possibilities of free-form carving and the accuracy of machining all in one. Of course there are drawbacks, like having to spend many more hours at a computer than actually working wood, but as a maker who is more interested in creating what I imagine than enjoying the process, I’m willing to make the sacrifice. Here are the finished pieces. If you want to see more images of these works you can find them in my furniture portfolio.

2018: Peripatetic is How I Expect It

Here is a new year's update about my crazy schedule for the coming months in case anyone is trying to keep tabs on me. As you may know, I closed up my studio in Boston in the fall, and I am now in the midst of a 9 month long period of itinerant fellowships, residencies, and independent studies.

First of all, I want to explain how this is even possible. I was incredibly fortunate in 2017 to win two remarkable awards. In the spring I was awarded a Massachusetts Cultural Council Artist Fellowship, which let me devote much of last summer to professional development (including making this website) and to devote the fall to technically challenging, experimental and so far non-remunerative new work. In September I received the John D. Mineck Furniture Fellowship from the Society of Arts and Crafts in Boston. This fellowship is allowing me to undertake a self-directed course of study in digital fabrication technology, with a focus on how I can use the technology to aid in veneering compound-curving forms. It will also allow me to buy a CNC router and other equipment.

Currently, I am nearing the end of a 4 month long Studio Fellowship at the Center for Furniture Craftsmanship in Rockport, ME. This has been my third stint at the Center, and as always it's been tremendously productive to work in their finely-tuned shops and get feedback and technical support from all the knowledgeable folks on campus. I was able to get a head start on my veneering project and on learning to use CAD software and to operate a CNC router. It felt a little silly to spend my days sitting at a computer while surrounded by such fine regular woodworking equipment, but hey, the tools they are a changin'.

In a couple weeks I'll be returning to another of my favorite haunts, the Penland School of Crafts where I'll be participating in their Winter Residency. I plan to continue working with the CNC router, but will shifting gears slightly to focus more on how I can use the technology for product design and development.

In March I am going to Newport, RI to spend two months working with and among students in the brand new Digital and Modeling Fabrication department at IYRS School of Technology and Trades. I will be piloting and helping to develop an artist residency program that will hopefully become a permanent part this new department. The concept is to introduce an artist or craftsman with a highly developed studio practice to the tools and technology of digital fabrication in hopes that they will bring fresh but refined sensibility to the field. Ideally, it will be a partnership that allows an artist to grow his or her practice through access to some extremely powerful technology, while giving IYRS students exposure to an individual who is new to the tools, but advanced in their ability to conceptualize, design, critique and quickly integrate the technology into their work. I believe this residency could also help mature the field of digital fabrication, which in my opinion is in need of more practitioners with the deep understanding of materials and process that is endemic to craftsmen. The question of how digital fabrication fits into my personal practice and the Studio Craft field at large is one I hope to explore more in the Slog, especially while I am immersed in the technology at IYRS. Check back if this is something you are interested in too.

And after all that, I'll be heading to Philadelphia to attend the long anticipated Windgate ITE Residency at the Center for Art in Wood. I applied for this residency in winter of 2015! I'm amazed that the time has finally come around. I'm looking forward to spending a couple months in Philadelphia and joining the long list of esteemed artists who have been a part of this well-established program. I hope it has been worth the wait.

So that's my plan.

Arrowmont, Fall 2017

For the last two weeks I have been teaching at the Arrowmont School of Arts and Crafts. The class, titled Superficial Surfaces, explored a multitude of techniques for decorating and adorning the surfaces of furniture and other woodwork. The first week was a technical smorgasbord in which I served up demonstrations in marquetry, parquetry, string inlay, metal wire inlay, and texturing/painting. In the second week students were able to explore one or two of these techniques in depth. I encouraged students to work quickly and without preciousness towards their creations; this class was about learning new techniques, not making finished products.

With only 3 students, this was by far the smallest class I have ever taught. I was concerned that it would be difficult for us to fill the space, both physically and energetically. Not to worry, by the end of the first week we had projects piled on every workbench and table, good music on the stereo and a bottomless pot of coffee ready and waiting. Walking around the studios at the end of the session, I was proud to see that our class produced as much quality work as other classes that were 3-4 times our size. Marquetry and inlay are esoteric techniques that require an immense amount of care and precision to execute well. It was inspiring to watch my students take on these demanding processes with ambition and creativity. Here's a sampling of of their explorations:


Process: A Dozen Pewter Cups

I frequently encounter a crisis of identity when I try to describe myself with certain terminology: designer, craftsman, artist—they all seem alternately applicable to the nature of my career. I know this is mostly a self-inflicted conundrum. It’s not as though anyone ever insists that I define my work in narrow, exclusive or absolute terms. I hope that in time I will simply care less, but at this moment it’s something I mull over often, partly out of insecurity, but also in an effort understand and define my goals and values as a maker of things. I don’t actually believe there are divisions between these terms or that they are fixed in relation to one and other, but to me each word has the power to connote a different emphasis on how one is engaged in a creative act.

Certainly a defining aspect of my work (one that I attribute to my craft training) is that in addition to being concerned with the aesthetics of an object, I am equally attendant to the“beauty” of process. I mean this in the same way one might describe a beautiful equation or piece of computer code—not really an aesthetic experience so much the idea that I have done something in the best possible way. In my case I am speaking about a synergetic combination of speed, economy, cleverness and pleasantness of actions that combine to create grace in process. This may not have an apparent visual impact on the object, but is at least an avenue for rigorous, striving engagement. I do also believe that a beautiful process tends to generate objects that have a clear, un-muddied quality, regardless of the particular aesthetic.

Most of my projects leave limited room for deeply exploring the beauty of process. Though it is on my mind all the time, I am usually making a single, one-off piece, and there’s no opportunity to go back and redo steps unless I have really screwed up. However, once in a while I take on a project in which my goal is to deeply explore and refine my sequence and efficiency of actions. This simple pewter cup design is one such project. I have made it a few dozen times over the last three years in order to home in on a process that works within my limited tooling and design parameters, which are that it must be a versatile size, impart the perceived value of a hand-formed metal cup, be impeccably crafted and sell for less than $100 retail. Other than the price point, which is $160, I am satisfied with how I am making these cups, as well as with their look and functionality.

Here’s a run down of my process in pictures. This is intended as a show-and-tell more than a set of instructions, but if you are interested in pewter-smithing and have any questions please shoot me an email. Click the first image to pull up a slide show with descriptions of each step.

Penland, Spring 2017

I recently returned to Boston after teaching a two-month long woodworking concentration at the Penland School of Crafts in the mountains of Western North Carolina. Over the years I’ve spent a lot of time at Penland in other capacities—as a work-study student and Core Fellow—and although I had a new role this time, the experience of living and working among a group of talented, creative and unusual artists was as seminal and moving as always. Teaching is a new endeavor for me, and I am beginning to see it as an excellent compliment studio work. For one, it encourages me to synthesize and articulate my often scattered knowledge and skill-set and, of course, points out the deficits therein. It also offers me a rare opportunity to inhabit a role in which my success is contingent on communicating and connecting with people rather than producing an object. As an instructor I called on aspects of my personality that are unnecessary and dormant in my solitary studio practice, and am glad to remember that I can (for two months, at least) be an affable person.

1.jpg

The course—an intensive, full-time survey of woodworking and furniture-making techniques—was by far the most ambitious and challenging teaching position I have yet had. Titled Woodworking, It’s a Process, the class sought to give students a foundational understanding of the properties of wood as a material and the most common and useful ways of manipulating it. It also touched on some esoteric techniques such as marquetry and metal inlay. The first week was dedicated to working with hand tools which gave students an understanding of the challenge and importance of accounting for grain direction in their design and workmanship. Students completed at least one carved spoon and one bandsaw box. Following that they learned about mortise and tenon joinery by making a small side table or coffee table. We moved on to study the basics of carcass construction with a wall-hung cabinet project and reserved the final two weeks for a self-directed, independent project.


Although the primary focus of this class was on the technical aspects woodworking, we took time each Friday morning to step away from the tools and consider some of the often overlooked psychological and emotional processes inherent to any creative endeavor. Through readings by Annie Dillard, Mary Oliver, Robert Grudin, David Pye and Aldo Leopold we inquired into how our nascent, nebulous visions manifest as tangible objects; the tortuous dance between creative achievement and time; the increasing disunity of design and craftsmanship, and whether there is such a thing as manual intelligence; and the conceptual implications of manipulating a material that is a historical record (of sorts). These are lines of inquiry that—for me, anyway—spark curiosity and engagement in my process and blaze the trail to new creations. Thankfully my students were willing to indulge me in taking them down this path.


There’s always some risk in signing up to spend two months in close quarters with a group of individuals you’ve never met. I’ve been in classes that to no one’s fault were plagued by a discordant combination of personalities. You can imagine my relief and gratitude as I discovered that my students were truly one of the most engaged, dynamic and joyful groups of people I’ve had the pleasure to know. Although my demonstrations occasionally bordered on farcical due to the quantity of banter and inside-joking, a culture of good humor and camaraderie was evident always—like that evening when I returned to the shop to find every single item on my workbench (even a nickel) adhered down with powerful double-stick tape, a prank I found both hilarious and impressively thorough.


But most impressive was the furniture that my students made. I was awestruck at our end-of-session show and tell, because even though I was witness to the process, it was hard to believe that eight weeks prior these woodworkers were mostly total beginners. Please take a look at some of their creations:

Six Around One—The Movie!

I recently delivered and installed a project that has occupied most of my attention and virtually all of my floor space for many months. Six Around One is a 6’ x 7’ interior sliding door I made to see if the intricate parquetry patterns I have been exploring would scale up to cover a huge surface, and as somewhat a of self-inflicted endurance test. It was late February when I set about the work of manually slicing around 4,000 5/8” wide x 6” long strips of butternut veneer, then burning the tip of each one in hot sand, then fastidiously taping them together into diamonds, then hexagons, then groups of hexagons. It’s just the sort of work that a romantic craft appreciator would effuse as “meditative”, and it was, in the moments when I would bring some presence of attention to those peaceful, repetitive actions. Of course, the reality is that most of the time I was staving off boredom or neurotic obsession with an armament of tricks and rewards—“just stick it out through one more Fresh Air podcast and then you can eat the last three chocolate covered biscotti.”

One thing, however, that brought some fun and novelty to these otherwise monotonous days was that my friend Jesse had taken it upon himself to produce a short film about the making of the door. Jesse works for a documentary film company just a few blocks from my studio and often comes over for an afternoon coffee. When I told him about my plans for this project he decided to start bringing a camera over and filming bits of the process, thinking it was strange enough to document. I obviously could not have been more thrilled than to have a professional filmmaker offering to document my process for the price of a reheated cup of coffee and a chocolate biscotti (if there were any left).

Jesse and I have been friends since childhood, and one of our main activities as kids was to make gratuitously gory live action and animated short films, which later progressed into a fairly serious interest in claymation that we pursued into our early 20’s. For this reason, having Jesse in my studio filming me at work was actually a familiar and stress-free process. Originally, we both thought this would be more of a typical “how it’s made” video with an explanatory narration over footage of me at work, but after one session of filming, it was clear that there was something in the austerely dim environment, and the way the small sounds of my work cut through the cave-like silence of my basement studio that warranted a different approach. Jesse decided to home in on the strange, percussive soundtrack of my endlessly repetitive actions—the slicing of veneer, the peeling of tape.

Jesse brought as much craftsmanship to the video and sound editing as I did to the door, and I’m so glad that both these projects are now complete and out there in the world. You can see more of Jesse’s films on his website or Vimeo page, and you can see more images of the finished door by clicking here.